

 en
en  English
 Español
 русский
 Deutsch
 عربى
عربى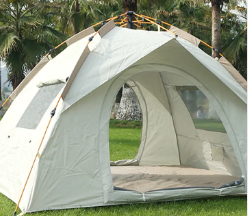
Setting up a Camping Tent might look easy when you watch someone do it in a video, but once you're out there in the field, things can feel quite different. It really depends on how well you prepare, what kind of tent and gear you bring, and the kind of spot you end up camping in. At the end of the day, your tent is your shelter. It keeps you dry when it rains, blocks the wind at night, and gives you a safe, quiet place to rest after hiking or exploring all day. That's why getting it pitched properly makes such a big difference to your whole trip.
Picking a tent from a reliable Camping Tent Factory can save you a lot of headaches. When the manufacturer actually cares about using good materials and smart design, the tent usually goes up faster, handles bad weather better, and feels more solid once it's standing. A lot of folks end up choosing a tent just because it looks nice in the photos or has a big capacity, but the real test comes when you're trying to set it up at the end of a long day. The ones that perform well in real conditions are the ones worth bringing along.
Doing the setup right isn't only about staying safe from the elements. It also has a lot to do with how comfortable you feel during the trip. A tent that's placed thoughtfully stays steadier in the wind, stays drier in the rain, and doesn't leave you dealing with uneven ground all night. When you pay attention to the small details along the way, the whole process goes smoother and you can actually relax instead of constantly worrying about whether everything is going to hold up.
Selecting the Right Camping Tent
Before you pack the car and head out, it pays to spend a little time picking the right tent for what you have planned. Different trips call for different kinds of shelters, and choosing wisely can make setup much easier.
Here are some of the most common types you'll see:
- Dome tents: They have that rounded shape that usually stands up pretty well to wind and still gives you a decent amount of room to sit up or move around inside.
- Tunnel tents: These stretch out longer, which means more living space for you and your gear, but they need to be staked down carefully because they can catch the wind like a sail.
- Pop-up tents: If speed is what you want, these are hard to beat. They often pop into shape in just a few seconds and tend to be fairly light to carry.
- Cabin tents: These are the bigger ones that give you plenty of headroom so you can stand up straight. They feel more like a small room, but they usually take more time and effort to put together.
The fabric the tent is made from matters a lot too. Lightweight materials are easier to carry on your back, especially if you're hiking in, while tougher reinforced fabrics hold up better against sharp rocks, branches, or sudden gusts. Don't forget about the poles, stakes, and rainfly either. Good quality ones make assembly smoother and help the tent stay strong when the weather gets rough.
You should also think about size and how many people plus gear will be inside. A larger tent gives everyone more space to spread out and store things, but it can take longer to pitch. Smaller, compact tents go up quicker and feel simpler to handle, though they can start feeling tight after a couple of nights. If you often camp in windy spots, on uneven ground, or far from the car, it's smart to look for a tent that's known for being fairly easy to set up.
Choosing the Ideal Campsite
The spot you choose for your tent can affect how comfortable, safe, and dry you stay during the whole trip. A flat, level piece of ground is usually the best place to start. It keeps the tent from sliding around and puts less pressure on the stakes and seams.
Here are a few other things worth thinking about when you're looking for a good location:
- Proximity to water: Being close to a stream or lake makes it easy to get water for cooking and cleaning, but stay clear of low-lying areas that might flood if it rains hard overnight.
- Wind direction: Try to set the tent so the entrance faces away from the main wind. This helps cut down on flapping noises and keeps cold drafts from blowing straight in.
- Natural barriers: Trees, thick bushes, or a gentle rise in the land can act as a natural windbreak and give you a bit of extra shelter from light rain or morning mist.
- Sunlight and shade: Too much direct sun beating down all day can heat up the inside and slowly wear out the fabric over time. If you can, pick a spot that gets some natural shade, especially during the hottest part of the day.
Taking a few minutes to choose the campsite carefully usually means the tent goes up with less effort and stays more stable once it's pitched. It also just makes the whole experience more pleasant and relaxing.
Preparing the Tent and Equipment
Before you start hammering stakes into the ground, it's worth taking a couple of minutes to get everything ready. Most setup problems happen because something is missing, the poles are tangled, or there's a small damage you didn't notice earlier.
Here are some practical habits that help a lot:
- Inventory check: Spread everything out and make sure you have all the poles, stakes, rainfly, guylines, and any other pieces that came with the tent.
- Inspection: Quickly go over the fabric for any small tears or holes, and check that none of the poles are bent or cracked.
- Organization: Lay the parts out in the order you'll need them during setup. This keeps things from getting confusing halfway through.
- Accessibility: Keep your mallet, extra stakes, or any other tools right beside you so you're not digging through bags later.
Having a clear, flat area to work in and keeping your gear organized makes the whole process go much faster. Even a short delay while you hunt for a missing part can feel annoying when the light is fading or rain clouds are rolling in.
Step-by-Step Tent Setup
A steady, step-by-step way of doing things helps the tent go up quickly and stay solid through the night.
- Lay Out the Tent Footprint: Start by spreading the groundsheet or footprint on the ground. Line it up the way you want the finished tent to face, keeping wind direction and any slope in mind.
- Assemble Poles: Connect the poles following the instructions that came with the tent. They can be springy and a bit tricky sometimes, so take it slow and don't force them if they don't slide together easily.
- Insert Poles Into Tent: Slide or clip the poles through the sleeves or attachment points on the tent body. This part is important because the poles are what give the tent its shape and strength.
- Raise the Tent: Carefully lift everything into position. If you have someone with you, ask them to hold the corners or help guide the poles — it makes this step way simpler.
- Attach the Rainfly: Place the rainfly over the top of the tent and fasten it down properly. Make sure it covers everything well without pulling too tight on any single spot.
- Secure Guylines and Stakes: Push the stakes into the ground at the right angle. Tighten the guylines a little at a time so the tent stays balanced and doesn't sag anywhere.
- Check Alignment and Ventilation: Walk around the tent and make sure it sits evenly on the ground. Open up the ventilation panels so air can move through and help prevent condensation building up inside.
| Setup Step | Key Points | Common Mistakes to Avoid |
|---|---|---|
| Lay Out Tent Footprint | Align with slope and wind direction | Wrinkled or uneven groundsheet |
| Assemble Poles | Connect securely, avoid force | Twisting or bending poles |
| Insert Poles Into Tent | Follow color coding or instructions | Misalignment causing instability |
| Raise Tent | Lift gently, team effort helps | Pulling one corner only |
| Attach Rainfly | Ensure coverage, avoid tension points | Overstretching causing fabric strain |
| Secure Stakes and Guylines | Proper angle and tension | Loose or uneven stakes |
| Check Ventilation | Maintain airflow to reduce condensation | Blocking vents or folding panels |
Electrical and Light Performance (Optional for tents with integrated lights)
Some modern Camping Tents come with built-in lantern hooks or even simple wiring for lights inside. If your tent has these features, using them the right way is important for safety.
- Secure connections: Make sure any wires or plugs are tight so you avoid sparks or sudden power cuts.
- Battery safety: Use the correct type of batteries and follow the instructions that came with the tent.
- Positioning: Keep lights and lanterns away from the tent fabric, sleeping bags, or anything else that could catch fire easily.
A small built-in LED can make evenings in the tent feel much more comfortable and convenient, but it's still worth being careful so you don't accidentally damage the tent or create a safety issue.
Keeping Things Safe When You Pitch Your Tent
The strongest tent in the world won't do you much good if it's not set up properly. A few careful choices and habits can stop small problems from turning into accidents or damaged gear out in the woods.
Here's what I always pay attention to:
- Drive stakes at an angle: Push them in pointing slightly outward from the tent. They hold a lot better against wind gusts and accidental tugs on the lines.
- Guyline tension: Pull them tight enough to keep everything stable, but don't yank them so hard that you risk tearing fabric or bending poles. Loose lines are easy to trip over at night.
- Clear the ground first: Take a minute to kick away rocks, roots, sticks, or anything sharp before you spread out the floor. It saves the tent and makes sleeping way more comfortable.
- Don't forget ventilation: Open the vents and windows even when it's cool outside. It cuts down on condensation and keeps the inside from feeling stuffy or damp.
Stay mindful of your surroundings and the tent stays much safer for everyone.
Handling Wind, Rain, and Sudden Weather Changes
Camping weather loves to surprise you. One hour it's peaceful, the next you're dealing with gusts, rain, or dropping temperatures. Learning how to position and tweak your tent makes a huge difference.
What works well in practice:
- Block the wind: Face the door away from the main wind direction. Use trees, rocks, or a natural rise in the land as a windbreak when you can.
- Get the rainfly right: Pull it tight so it fully covers the tent with no loose spots where water can pool or sneak in.
- Match stakes to the ground: Soft dirt might need deeper stakes or extra guylines. Hard or rocky ground calls for a gentler touch and different angles.
- Make quick fixes: If the weather turns nasty, spend a couple of minutes tightening lines or adjusting poles. It often saves you from bigger problems later.
Being ready to adjust on the fly keeps your camp dry and steady when conditions shift.
Taking Care of Your Tent Between Trips
A decent tent can last for many seasons if you give it a little attention after each use. These simple steps prevent most common headaches.
My usual routine:
- Clean it gently: Brush off dirt and debris or wipe it down with a damp cloth. Harsh cleaners can damage the waterproof layers, so I keep it mild.
- Dry it completely: Never pack a tent away wet or even damp. I set it up in the yard or garage for a few hours until it's bone dry to avoid mildew and bad smells.
- Fix small issues right away: Patch tiny tears, straighten bent poles, or replace worn parts before they get worse. A basic repair kit stays in my gear bag.
- Store it smart: Keep the tent in a cool, dry place out of direct sun. A breathable storage bag works better than leaving it stuffed in its original sack for months.
Look after your tent and it will look after you on future trips.
Making Setup Quicker and Less Frustrating
Nobody wants to fight with tent poles as the sun is dropping. A little preparation and practice can cut your setup time way down without cutting corners on safety.
Here are the tricks I rely on:
- Sort everything beforehand: Lay out the poles and parts or loosely connect them before you even leave home.
- Follow the color codes: Most tents mark poles and clips with colors — stick to them and you'll avoid a lot of mix-ups.
- Practice at home: Set the tent up a couple of times in the backyard. You get the rhythm of it and make fewer mistakes when you're actually camping.
- Split the work: With a group, one person holds corners while another threads poles or clips on the rainfly. Teamwork makes it faster and more fun.
Small habits like these turn setup into something quick and calm instead of a chore.
Picking a Solid Tent and a Good Maker
The tent you choose affects how much you enjoy camping. Strong materials, thoughtful design, and reliable support make a real difference in how easy and dependable it feels.
Important things to consider:
- Fabrics and poles that can handle real wind, rain, and regular use
- A design that makes pitching straightforward and keeps the tent stable once it's up
- Easy access to spare parts and helpful advice when something needs fixing
A company that builds tents with these things in mind takes a lot of the worry out of camping.
Common Mistakes and How to Skip Them
Even people who camp a lot still make these errors sometimes. Spotting them early saves trouble:
- Poles not lined up right: Twisted or half-connected poles make the whole tent wobbly. Take the extra few seconds to seat them properly.
- Ignoring the slope: Setting up on uneven or sloped ground puts extra stress on stakes and fabric. Find the most level spot you can.
- Bad tension: Guylines or rainfly straps that are too loose cause flapping and sagging; too tight can rip things. Aim for even tension all around.
- Forgetting the environment: Not thinking about wind direction, hidden hazards, or the type of soil can create problems once the weather changes.
Slow down for a moment during setup and you'll catch most of these before they become real issues.
Making the Inside Feel More Comfortable
Once the tent is pitched, a few easy additions turn it from basic shelter into a place you actually enjoy spending time.
Simple things that help:
- Put down a ground sheet or mat to protect the floor and add a bit of insulation.
- Keep gear organized in sacks so you're not tripping over everything inside.
- Use the vents and windows to control moisture and keep air moving.
- Add small personal touches like a comfortable pillow, a soft light, or a little organizer.
These details make a surprising difference, especially on longer trips or damp, chilly nights.
Wrapping It Up
A smooth camping trip comes from good preparation, careful setup, and respecting the outdoors. When your tent goes up easily, stays stable in the weather, and holds up over time, everything else feels easier and more fun.
From choosing the right spot to handling changes in the weather and adding a few comforts inside, the little things really add up.
If you're looking for practical, durable tents that work well for beginners and experienced campers alike, Zhejiang Mansen Leisure Products Co., Ltd. builds gear that helps every trip get off to a confident start and run smoothly.
Get outside, set up thoughtfully, and enjoy your time under the stars.
