

 en
en  English
 Español
 русский
 Deutsch
 عربى
عربى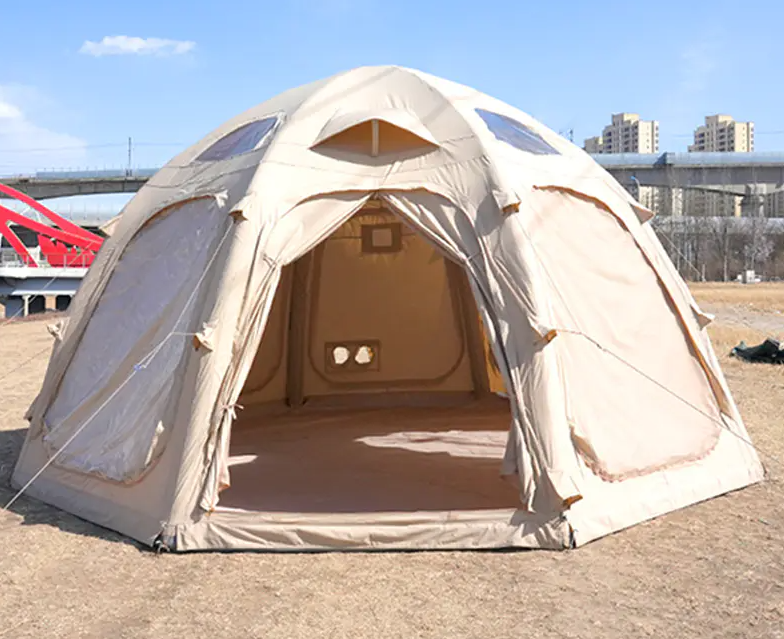
Lightweight Inflatable Tents change the way shelter gets set up in the outdoors. They rely on air-filled beams instead of solid poles. Once inflated, the beams support the fabric and bring the whole structure into shape. This method makes the tent easier to carry and quicker to pitch for many people. The focus often comes down to how well the air system holds up, how the fabric stays tight, and how the anchors keep everything steady.Zhejiang Manson Leisure Products Co., Ltd. is one of many companies engaged in the manufacture of Lightweight Inflatable Tents.
Weight and Packed Size
These tents keep the overall weight low so they're comfortable to carry on foot or load into a vehicle. When packed, they usually roll into a compact shape – something like a sleeping bag or a small duffel. The size works well in backpack side pockets or car trunks without taking up too much room. Lighter fabrics help cut weight, but the beams still need enough material to stay strong when filled. Valves and fittings add only a little bulk, yet they influence how neatly the tent folds away. Most users notice right away how much easier it feels compared with heavier traditional gear.
Setup Steps and Solo Use
Pitching the tent starts with laying out the floor, connecting the pump to the valves, and inflating the beams one by one. The order matters so the frame rises evenly. A single person can manage the whole process after a couple of tries. The effort comes from pumping rather than sorting poles. Once the beams are firm, stakes go in at the corners and guy lines get tightened to keep the fabric taut. No separate poles to thread or align. The routine feels straightforward once you know the valve sequence. Choosing a flat spot before starting saves time later.
Strength of the Air Beams and Leak Risks
The beams are built from layered material meant to hold air pressure while flexing with movement. Valves need to seal well but still connect quickly to a pump. Wear tends to show up at beam seams, valve bases, or spots that rub against the ground. Small leaks can happen from tiny punctures or slow material fatigue. When pressure drops, users usually hear a faint hiss or notice the tent softening. Patch kits fix most surface damage if applied promptly. Too much pressure stresses the seams; too little makes the structure floppy. Checking beams and valves regularly helps spot trouble early.
How They Handle Wind
Many Inflatable Tents have a rounded shape that lets wind slide past more easily. The beams bend a bit under gusts instead of fighting them rigidly. Extra tie-down points and guy lines spread the holding force evenly. Lower tents usually face less lift from wind compared with taller ones. Side winds often test stability more than direct headwinds. Keeping the fabric pulled tight stops it from flapping and adding stress. Picking a sheltered spot and facing the narrower end into the breeze helps a lot.
A quick look at wind-related aspects:
- Tent shape → rounded or low profile reduces wind push
- Beam flexibility → bends to absorb gusts
- Anchor setup → multiple points and tight lines hold position
- Fabric tension → even pull prevents billowing
Rain and Waterproofing
The fabric gets coatings and sealed seams to keep water out. Raised edges on the floor help stop water from creeping in from the ground. The outer layer channels rain away from the inside space. Good seam taping makes a big difference during steady rain. Ventilation helps manage condensation when warm air meets cooler walls. Keeping the tent properly tensioned avoids sagging spots where water can collect. Wiping off dirt keeps the water-repellent finish working longer. In very wet conditions, choosing a site with good drainage around the tent adds extra protection.
Ventilation and Internal Comfort
Airflow makes the inside of a Lightweight Inflatable Tent much more livable, especially when you're spending the whole day or night inside. Most designs include mesh panels on the doors, windows, and sometimes the roof or side walls. These keep bugs out while letting fresh air pass through freely. Many tents have roll-up or zippered sections so you can open them wide on hot days or close them tight when it's windy or cold.
A few simple things help manage the environment inside:
- Place openings on opposite sides for cross-ventilation
- Open higher vents to let warm air escape
- Keep lower vents open for cooler air to enter
- Adjust panels based on the weather – more open in summer, more closed in cooler seasons
Condensation often appears on the inner walls at night when warm air from breathing meets cooler fabric. It's common and usually harmless, but good airflow reduces how much builds up. Keeping sleeping bags or gear away from the walls helps too. Some tents add extra mesh layers or adjustable vents so you can fine-tune the balance between fresh air and warmth without letting everything blow around.
Comparison with Traditional Pole-Based Tents
Inflatable Tents take away the hassle of carrying long poles and figuring out how to thread them through sleeves. Instead of mechanical assembly, the focus shifts to pumping air and securing the base. Weight spreads more evenly across the fabric and beams rather than sitting in heavy pole sections. When packed, the shape becomes soft and flexible – it squeezes into odd spaces in a pack or car much more easily than rigid tubes.
The setup experience feels different:
- Pumping uses steady effort instead of precise pole alignment
- No clips or ferrules to connect or break
- Beams flex naturally with wind or uneven ground
- Maintenance moves from fixing bent poles to checking air pressure and seams
Both types have their strengths. Traditional tents often feel more familiar to people who have camped for years. Inflatable ones shine when the priority is keeping weight down and packing small. Wind behaves differently too – rigid poles can transfer force straight to the anchors, while air beams absorb some of it by bending slightly.
| Aspect | Inflatable Tent | Traditional Pole Tent |
|---|---|---|
| Packed shape | Soft, flexible roll | Long, rigid tubes |
| Setup focus | Pumping and anchoring | Pole threading and clips |
| Weight distribution | Spread across fabric and beams | Concentrated in poles |
| Behavior in wind | Beams flex to take gusts | Poles resist more rigidly |
| Typical repair | Patch leaks or check beam seams | Straighten or replace pole |
Inflation Method Options
You have a couple of main ways to fill the beams. A manual pump works by hand or foot – it's simple, needs no batteries, and goes with you anywhere. It takes more physical effort, especially on bigger tents, but many people prefer it because it's always ready.
Electric pumps connect to a car outlet, portable power bank, or small charger. They fill the beams quickly with almost no work. The downside is needing a power source and carrying the extra piece. Lots of users keep both options – a manual pump for backup and an electric one for regular trips.
A few practical notes on inflation:
- Valves usually lock securely to the pump
- Some include a pressure indicator to avoid overfilling
- Dual kits give flexibility for different situations
- Secure connection matters so air doesn't escape while pumping
The right choice depends on your trip style – remote backpacking leans toward manual, while car camping often favors electric for speed and ease.
Service Life and Long-Term Care
Every time you inflate and deflate, the beams and fabric get a little wear. Sunlight over weeks or months can weaken coatings and fade colors. Sharp creases from tight packing can create stress lines if left that way too long.
A few habits help the tent last longer:
- Deflate fully before rolling to let the beams relax evenly
- Fold or roll along the original lines to avoid sharp bends
- Clean off sand, salt, dirt, or sap after each trip
- Store in a dry, cool place away from direct heat or freezing cold
Regular checks make a difference. Look at valve seals for cracks, seams for small frays, and anchor loops for wear. A quick patch or seam touch-up often fixes minor issues before they grow. Gentle handling during setup and takedown – no dragging across rocks, no over-tightening lines – adds many more uses over the seasons.
Practical Considerations Across Different Uses
Different outdoor trips ask for different things from a Lightweight Inflatable Tent. Backpacking trips put the biggest emphasis on low weight and a small packed size – the tent needs to disappear into the pack without adding much load.
Car-based camping opens up more room for slightly heavier designs with taller headspace or bigger floor area. Family outings usually want multiple doors, good cross-ventilation, and enough space so everyone can sit inside comfortably without feeling cramped.
Coastal areas highlight the need for strong anchors and shapes that shed wind well. Forest or mountain settings call for solid bug protection and ways to handle condensation on cool nights. Summer use leans toward maximum airflow and shade, while cooler weather needs better heat retention and fewer open panels.
Ground conditions matter too:
- Soft sand needs wide sandbags or deep stakes
- Rocky soil calls for sturdy pegs or extra guy lines
- Uneven ground benefits from careful leveling before inflation
Every setting brings its own small tweaks, but the core advantages – light carry, quick setup, flexible shape – show up across all kinds of trips.
